How to make glaze test tiles
There are several ways to make your glaze test tiles:
- Throwing a ring on the weel
- Handbuilding from slab
- Extruding test tiles using Relyef dies made for wall-mounted ceramic hand extruder (Shimpo EX 115)


This tutorial focuses on the third option - Extruding test tiles.
Select a Relyef extruder die test tile profile. It is wise to select the one most similar to the decoration style you regularly use in your work.


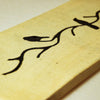
If you use stamps, you can decorate the clear side of each test tile on the leather-hard clay.

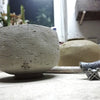
Extrude the strips.
To get the most information about the glaze, use the clay you plan to use for your final work. Most glazes tend to look differently on each clay.

The differences can be significant, especially between light porcelain-type bodies and clays rich in iron (or other oxides).
Insert a lump of clay around 2-3 kg (4-6 pounds) into the extruder.
The mass should pass through the press evenly at the standard pressure exerted by the force of a medium-strength woman. If not, the clay is probably too hard.
The softer clay has a higher tendency to collapse and deform, so it is necessary to work gently and with care. As the strip emerges from the extruder, it can warp slightly. It helps to guide the strip by hand while extruding.

Cut the strip with a string and transfer the settled semi-finished product onto a suitable pad placed on the table. After it reaches the leather-hard stage, cut the test tiles (3-5cm/1,2-2inch wide). The test tiles can be cut by a knife for ceramics or by a string. At this stage, you can also decorate by stamps.

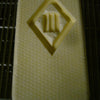
You can use Relyef alphabet stamps to mark each test tile from the bottom side. Stamp all the necessary information you will need after firing to identify the clay, glaze, and firing schedule used.
Let the tiles dry, clean them with a damp sponge, and bisque fire them.
If you use slips or engobes for your work, do not forget to apply those before bisque firing.

Glaze your test tile in the same way you would your final work. The way glaze is applied is very important, because the appearance of fired glaze can be significantly influenced by the thickness or application of the glaze. So whenever you use brushing, spraying, dipping, or pouring on your final work, use the same process on the test tiles.


