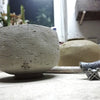
How to correctly prepare clay for stamping


If you wish for detailed stamp impressions, you need fine clay, without additives and larger particles. Coarse clay may produce a less detailed imprint.


On top of learning the right stage of drying to start your stamping process, you need to take the volume changes of the clay that happens once the clay is stamped into account. The mass gets compressed in one place, and consequently, it will gain mass around the stamp. For this reason, it is wise to plan your overall design layout on the vessel. When planning the pattern you can also incorporate your previous findings about the right time for each stamp and proceed with stamping one stamp in a less dry stage and then wait a bit and proceed with another stamp in dryness close to the leather-hard stage.


This feature needs to be taken into account. Otherwise, the expression will be distorted or shifted.


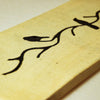
Slab work is excellent for learning to work with stamps. Slab work can be stamped and then assembled into the shape of a specific object. In addition, slabs, unlike wheel-thrown vessels have the same thickness overall.


In the case of the wheel-thrown vessel with different wall thickness, thinner, weaker areas need to be covered. Sometimes additionally moistened. Note, however, that not all types of clays are suitable for such a procedure. In ceramics, there are a lot of steps that work only with some clay and can lead to damage in others. It is difficult to give general advice that would work with all clay types. Perhaps just: test everything first.

If you moisturize, it is good to do that with anticipation. After moistening a specific area for the given decor, we found it helpful to cover the container with plastic for a while. This softens the transition between the drier and wetter parts of the object. Then cracks in the transition layer do not occur so often.

On the contrary, sometimes the opposite is needed. If we want to enliven more detailed, delicate, or complex decor then the decorated surface needs to be dried. It could be dried locally, but it requires quite a bit of experience. Separation with some levelling agent is also possible. For example, baby powder, talc, or flour worked for us.


At first, it is good to learn to work with one type of clay and only later proceed to others as each may behave differently.

